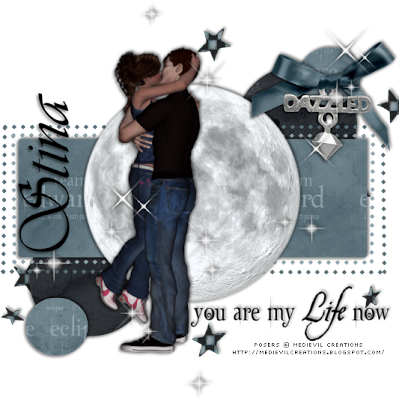
Eclipse of the Heart

To complete this tutorial, you will need the following items:

PSP ( I used version 9 but it should work in ANY version!)

I used a template made by me. You can get it HERE

Scrap kit of choice or the one I'm using by Designs by Stina called
"Eclipse of the Heart - Edward".
You can find it HERE.

Tube of choice. I used the poser included in the kit.
If you use the same please read and follow TOUs.

I also used the Word Art in Stinas awesome kit.

This tutorial was written by me on July 9, 2010. It is entirely my own idea and any similarity to another other tut is purely coincidental! You may print this tutorial out for your own needs but please do not copy and paste it ANYWHERE or claim it as your own.
You may link to my tutorial for group use.

All set? Let's go! This will be an easy one. Using templates has got to be the easiest thing ever!

First of all, hit shift D to duplicate the template so you will be able to use it again!

I closed off the copyright layer, the background layer and the large circle layer.

I used the moon from the kit to replace the large circle on the template.

Make "rectangle" active. Selections>Select All>Float>Defloat. Copy and paste a paper of choice as a new layer. I used Paper12. Selections>Invert>Delete. Selections>Select None.

You can now either delete the "rectangle" layer or close the eye next to it in your layer palette.

I repeated the above steps with the "medium circle" layer and used Paper17 and then on "small circle" layer, used Paper03. Drop shadows were added at this point.

You can now either delete the circle layers or close the eye next to it in your layer palette.

I adjusted the color of both border layers. Adjust>Color Balance>Manual Color Correction. I used the 2 shades of blue from the papers.

Add as few or as many elements as you like!
Add drop shadow to your elements.

Now all thats left is adding a tube of your choice or one from the kit.
I gave the tube the same small drop shadow as all my layers
and positioned mine to the left so that the word art I chose would fit nicely.

Add your text and copyright. If you want a transparent tag, save as a .png.

Thanks for trying my tutorial! I would love to see your results!
Happy Scrappin'!

Noise with Dirt Layout

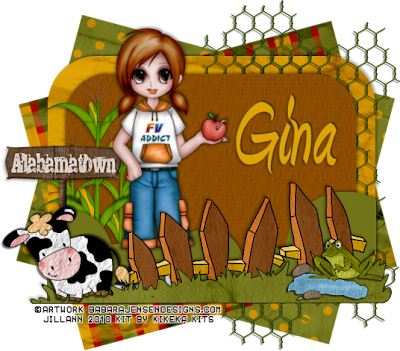
I used "Alabamatown" by KiKeKa Kits. You can find it HERE
Elegant Word Art by Bethany HERE

Alabamatown

To complete this tutorial, you will need the following items:

PSP ( I used version 9 but it should work in ANY version!)

Template #61 by Missy. You can find it HERE along with some other awesome templates! Don't forget to leave her some love if you download something!

Scrap kit of choice or the one I'm using by KiKeKa Kits called "Alabamatown".
You can find it HERE.

Tube of choice. I am using the awesome artwork of Barbara Jensen, which you can purchase HERE. She does not require a license to use this artwork but does require credit, so please read her TOUs.

Font of choice. I used Amienne.

This tutorial was written by me on May 25, 2010. It is entirely my own idea and any similarity to another other tut is purely coincidental! You may print this tutorial out for your own needs but please do not copy and paste it ANYWHERE or claim it as your own. You may link to my tutorial for group use.

All set? Let's go! This will be an easy one. Using templates has got to be the easiest thing ever!

First of all, hit shift D to duplicate the template so you will be able to use it again!

I closed off all the circle layers, the copyright layer and the background layer.

Make "rectangle" active. Selections>Select All>Float>Defloat. Copy and paste a paper of choice as a new layer. I used Paper01. Selections>Invert>Delete. Selections>Select None.

Rotate this layer to the left by 15.

Repeat these steps, using another paper. I used Paper16.Rotate this layer to the right by 15. You can now either delete the "rectangle" layer or close the eye next to it in your layer palette.

I added a small drop shadow to each of the layers at this point and resized each layer by 85%.

I repeated the above steps with the "rounded edge -lighter" layer and used Paper5 and then on "rounded edge - darker" layer, flood filled with a shade of brown from the tube. Drop shadows were added at this point.

I resized the "shape" layer by 87% and flood filled it with a shade of green from the papers. I added a small drop shadow at this point.

Add as few or as many elements as you like! I resized the elements so that they would fit in front of the "shape" layer. Add drop shadow to your elements.

Now all thats left is adding a tube of your choice or one from the kit.
I gave the tube the same small drop shadow as all my layers
and positioned her so that it looks like shes leaning on the sign.

Add your text and copyright. If you want a transparent tag, save as a .png.

Thanks for trying my tutorial! I would love to see your results!
Happy Scrappin'!

Eff You


To complete this tutorial, you will need the following items:

PSP ( I used version 9 but it should work in ANY version!)

Template #101 by Ali. You can find it HERE along with some other awesome templates! Don't forget to leave her some love if you download something!

Scrap kit of choice or the one I'm using by Farrah's Designer Scraps called "Damaged". You can find it HERE.

Tube of choice. I am using the awesome artwork of Elias Chatzoudis, which you can purchase HERE. Please do not use the same without a proper license!

Font of choice. I used Forte.

This tutorial was written by me on March 22, 2009. It is entirely my own idea and any similarity to another other tut is purely coincidental! You may print this tutorial out for your own needs but please do not copy and paste it ANYWHERE or claim it as your own. You may link to my tutorial for group use.

All set? Let's go! This will be an easy one. Using templates has got to be the easiest thing ever!

First of all, hit shift D to duplicate the template so you will be able to use it again!

I closed off the following layer: "Raster 1"

Make Shape6 active. Selections>Select All>Float>Defloat. Copy and paste a paper of choice as a new layer. I used Paper4. Selections>Invert>Delete. Selections>Select None. You can now either delete the Shape6 layer or close the eye next to it in your layer palette.

Do these steps for your Shape6 Copy layer, using the same paper. Repeat the steps for your Shape3 layer. I used Paper5. Repeat the steps for your Layer1 layer. I used Paper1. Repeat the steps for your Shape5 layer. I used Paper12.

I added a small drop shadow to each of the layers at this point.

Next I added the circles with the buckle from the kit and placed it behind the circle layers of the template. I rotated it 45 degrees. I added a small drop shadow to the circles at this point.

Next I added the torn paper from the kit. I placed it behind the circle layers of the template but on top of the circles from the kit.I added a small drop shadow at this point.

Add as few or as many elements as you like!

Now all thats left is adding a tube of your choice.
I gave the tube the same small drop shadow as all my layers
and positioned her so that it looks like shes coming out of the frame.

Add your text and copyright. If you want a transparent tag, save as a .png.

Thanks for trying my tutorial! I would love to see your results! Happy Scrappin'!
In The Navy


To complete this tutorial, you will need the following items:

PSP ( I used version 9 but it should work in ANY version!)

Template #51 by Gina. You can find it HERE along with some other awesome templates! Don't forget to leave her some love if you download something!

Scrap kit of choice or the one I'm using by Dragonfly Dreams Designs @ Scrappin Bratz called "American Spirit". You can find it HERE.

Tube of choice. I am using the awesome artwork of Scott Blair, which you can purchase HERE. Please do not use the same without a proper license!

Font of choice. I used Mazurka.

This tutorial was written by me on March 22, 2009. It is entirely my own idea and any similarity to another other tut is purely coincidental! You may print this tutorial out for your own needs but please do not copy and paste it ANYWHERE or claim it as your own. You may link to my tutorial for group use.

All set? Let's go! This will be an easy one. Using templates has got to be the easiest thing ever!

First of all, hit shift D to duplicate the template so you will be able to use it again!

I closed off the following layers:
Credit Info, White backround, long rounded rectangle, rounded rectangle frame
and rounded rectangle fill.

Make Circle1 active. Selections>Select All>Float>Defloat. Copy and paste a paper of choice as a new layer. I used Paper17. Selections>Invert>Delete. Selections>Select None. You can now either delete the circle layer or close the eye next to it in your layer palette.
Do these steps for your circle2 layer, using the same paper. Repeat the steps for your Circle3 and 4 thin rectangles layer. I used Paper16.
I added a small drop shadow to each of the layers at this point.

Next I added the red doodle from the kit and placed it to the top left and behind the template. Then DuplicateI added a small drop shadow to the doodles at this point.

Next I added the white round frame from the kit. I resized it by 75% and placed it behind the template and doodle on the left and then Duplicate>Mirror
and resized by 75% again and placed it on the right.
I added a small drop shadow to each of them at this point.

Next I added the blue star from the kit and resized it by 75%.
I rotated it to the right 10 degrees and put it to the top right and behind all layers.
I added a small drop shadow to the star.

Now all thats left is adding a tube of your choice.
I gave the tube the same small drop shadow as all my layers.

Add your text and copyright. If you want a transparent tag, save as a .png.

Thanks for trying my tutorial! I would love to see your results! Happy Scrappin'!

Feel Lucky?


This tutorial was written by me on March 9, 2009. It is entirely my own idea and any similarities to any other tutorial online are purely coincidence.

For this tutorial, you will need:
Template #129 by Gina's Gems. You can find it HERE. Gina has many awesome templates to choose from. Dont forget to leave her some love.

Font of your choice. I used GiddyUp and applied Eye Candy 5 Glass plug-in but that is optional.

Scrap kit of choice, or the one I used called St. Patrick's Day by Annie's Designs. It's a beautiful kit and it's available in tagger size.You can find it HERE . Check out Annie's other great products while you're there!

Tube of choice. I am using the awesome artwork of Rachael Huntington. You can purchase it HERE. Please dont use the same tube without the proper licensing!

Open your template. Shift + D to Duplicate and close off the original for now. I closed off the Credit layer, the white background layer, greyscaled glittered shamrocks and the doodles layer. As there are so many great elements in the kit to use.

Click on the Frame layer to make it active. Click on the layer on your template with your Magic Wand set to Feather 2. Open a paper of choice. I used Paper10. Copy and Paste onto your template as a new layer. Selections, invert and hit delete to get rid of the excess.
Selections, None.

Click on the Fill layer to make it active. Same steps as before with your Magic Wand. I flood filled with Black but you can use another paper if you would like. Selections, None.

Click on the 2 rectangles layer and repeat the above steps.
I flood filled with a light shade of green.

Click on the Small Shanrock layer and repeat the above steps.
I flood filled with a dark shade of green.

Use the Move Tool and move the glitter shamrocks where you like them.
I duplicated mine and used the Eraser tool to remove excess.

Next I opened Gemstone2 from the kit and pasted it behind the all the template layers and moved it to the top left of the canvas. Duplicate/ Mirror / Flip to get one on the bottom right.

Next I added Clover2 and positioned it on the top right of my Black Fill layer. I duplicated to make it look more 3-D. Merge, Merge Down. Duplicate/Mirror/Flip to get it on the bottom left of your Black Fill Layer.

I added a small drop shadow to ALL layers at this point but that choice is yours.

Time to add your tube of choice. I added mine and centered her.
I added a small drop shadow to her as well.

Add any other embellishments you wish at this point.

I resized before I added my copyright info.
Layers/Merge/Merge Visible. I resized to 475 pixels.
Add your copyright and credits. Layers/Merge/Merge Visible.

I decided to add the name in the same yellow/gold color as the shamrocks.
I added glass effect to it to make it look similar to them as well.

Thank you for trying my tut. I hope you enjoyed it!

Anchor's Away!

This layout was made using my kit
"Anchor's Away!"
You can find it HERE